Building a Dry Stack Stone Wall
Welcome to the Dream Yard how-to module for building a dry stacked stone wall. It may seem like a lot of information and reading, but it will be well worth it.
You are going to save yourself hundreds or thousands of dollars, so you must be prepared to invest the time into doing it right.
There is nothing more beautiful and elegant, than the look of a natural stone wall. After building many walls, I still feel a sense of pride and pleasure when I stand back and look at the work I have done. This may not be for everyone though, you must be willing to get dirty, and possibly have a few bruises or cuts along the way.
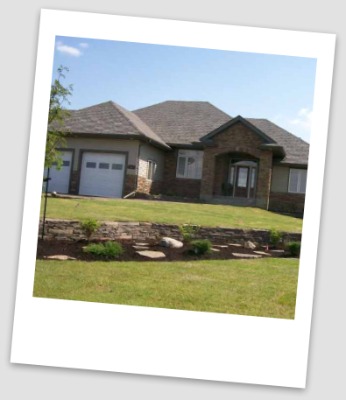
If you are still at the thinking stage, we recommend you visit our photo gallery for some retaining wall ideas.
You can also follow us on Pinterest by clicking the Pinterest button on any sidebar. We have over 80 different landscaping categories on Pinterest, with over 11000 pictures including a section on stone wall ideas.
This module is designed for building natural stone walls to a height of 3 to 4 feet.
Walls over this height generally require an engineered wall and
may be beyond the scope of most do-it-yourselfers.

Regulations may vary in different areas on when engineered walls are required, so we suggest you check with your local authorities.
One way to avoid having to build an engineered wall is to terrace your project. This is simply building multiple smaller walls in place of one large one.
We must note that even terracing may have specific requirements of how far apart each terrace has to be before you build the next wall.
You don’t need to own expensive equipment, or many tools to build a natural stone wall.
What you will need is proper planning, patience, and a willingness to learn.
This how-to is designed to give you the confidence and knowledge that will allow you to complete your project like a professional.
We will try to keep things simple and easy to follow with pictures, diagrams and video when possible.
In most cases when walls fall apart, it is due to two reasons:
- The lack of proper preparation work (resulting in a failure to control the forces of nature), or
- Poor construction and stacking.
A stone garden wall must have a properly prepared sub base (solid ground or gravel under the wall), proper back fill and drainage behind the wall, batter (angle), and landscape fabrics or geotextile (for northern climates with heavy frost). These elements vary depending on the zone (climate), that you live in.

It may also be required by law to have fences and railings installed if there is a certain drop of the edge of a patio wall. If your wall is supporting heavy vehicles on a driveway, you may need to use advanced construction methods. It is always your responsibility to follow up, and check on all legal requirements for you area.
Let’s get to it. And don’t forget to take lots of pictures. We would love to see them and post them on the site. I have broken this down into different sections with explanations for each one. If there is anything that you don’t understand please feel free to contact us. I hope you enjoy this and find it a useful starting point.
Thanks. Let’s get started.
Choosing your dry stack stone wall site...
_____________________________________
Table of Contents: Dry Stack Stone Wall
Introduction: Dry Stack Stone Wall
A. Wall Site
B. Wall Tools
H. Chinking, Completing Wall & Clean-up
______________________________________
Go to Dream Yard Home Page from Stone Wall Introduction
Check out our time and money saving e-book

How to avoid the biggest mistakes made by DIYers, designers, and landscaping companies.
Visitor
Favorites


Giggles 'n' Thoughts
